LINGO Excel Add-In

Contents
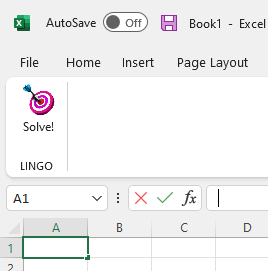
LINGO ships with an add-in to Excel that can make interfacing Excel with LINGO more straightforward. The LINGO Excel add-in installs the following LINGO Solve button on the Excel ribbon:
Clicking on the Solve button causes any LINGO model contained on an Excel tab called LINGO_model to be passed to LINGO for solution. Presumably, the model will also have @OLE links to Excel (as described in the sections above) for passing data and solutions between LINGO and Excel. Models integrated into Excel in this manner can be presented to novice users unfamiliar with LINGO and its modeling language. The novice user would then view the workbook and a "smart" workbook, capable of solving a particular application of interest, say a portfolio optimization model or a vehicle routing model, but without any knowledge of LINGO required on the user's part.
| Note: | It is not required to install the LINGO Excel add-in for interfacing LINGO and Excel. The @OLE Excel links discussed in the previous sections of this chapter are all available with or without the Excel add-in being installed. However, you may find having the add-in installed makes it easier for novice users unfamiliar with LINGO to solve their models. Experienced LINGO users may also find the add-in useful to reduce the amount of back-and-forth required between LINGO and Excel. |
The LINGO Excel Add-in is provided in an Excel .XLAM, with file name LINGO<rel>.XLAM, where <rel> corresponds to your particular release of LINGO. This file may be found in the main LINGO folder. The file extension .XLAM is an Excel Macro-Enabled Add-In. Once an XLAM file is attached to your Excel Add-ins list, it will be available each time Excel is opened. This step need be done only once.
There are two steps to attach the LINGO add-in to Excel:
Step 1: Add the directory containing the LINGO.XLAM file to your Excel’s list of trusted locations. To do so, open Excel and enter the commands: File | Options | Trust Center | Trust Center Settings. Next, go to Trusted Locations and click Add new location. Browse to the directory containing the LINGO XLAM file and then click on the folder. For 64-bit versions of LINGO, this folder is typically:
\LINGO64_20
For 32-bit LINGO, the typical directory is:
\LINGO20
Once the folder is added to the list of trusted locations, click OK and restart Excel.
Step 2: Attach the LINGO add-in to Excel. First open Excel and then click: File | Options | Add-ins | Go, which will open the Excel Add-ins menu. On the Add-ins menu click Browse and navigate to the LINGO XLAM file in the main LINGO folder and then double-click on the file. Make sure that the LINGO Add-in check box is checked and then click OK. The Excel ribbon will now contain a LINGO Solve button which can be used to solve your built-in LINGO models.
Once you've successfully installed the Add-in, you can test it out by loading the TRANXLAM.XLS file from the LINGO Samples folder. This is an example of the Transportation model presented above. The first tab in the workbook, TRANXLAM, appears as follows:

This tab contains the input data, as well as a range (C25:F27) for receiving the optimal shipment values. This is the tab the novice end user may be most interested in, for inputting current data and the receiving optimal shipping quantities.
The second tab, titled LINGO_model, contains the LINGO model that will be used to determine the optimal shipping volumes. The LINGO model must be placed in the first column of the LINGO_model tab. The LINGO_model tab for this example appears as follows:
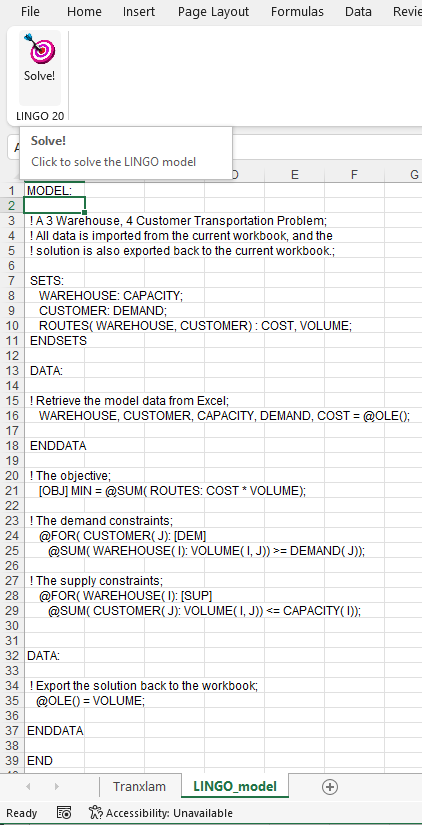
Note that the model text begins with a MODEL: statement and terminates with an END statement. Both these statements are required. Also, the model contains @OLE statements to both read data from and write the solution to the workbook. We did not have to explicitly specify the workbook name as an argument to the @OLE statements because we simply want LINGO to work with the current workbook. We also did not have to specify range names for the inputs and outputs, given that we preassigned range names identical to the object names in the model, e.g., the warehouse capacity data is in a range called CAPACITY, the same as the name of the attribute in the model.
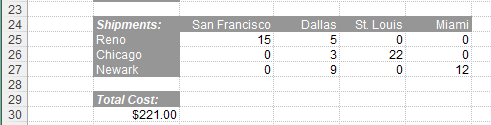
After pressing the Solve button, the model is passed to LINGO for solution. The optimal shipping values are written to the workbook in the VOLUME range (C25:F27):
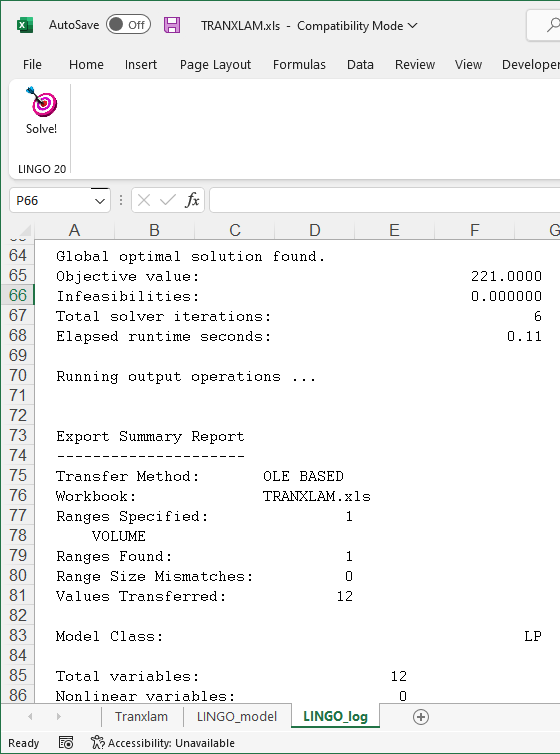
Note that a new tab called LINGO_log will appear in the workbook. This tab contains a log of the LINGO run and is a good place to look when tracking down any errors you might encounter:
If you see an error message resembling the following after pressing the Solve button, then this means the bit levels (32 or 64 bits) of LINGO and Excel may not match:
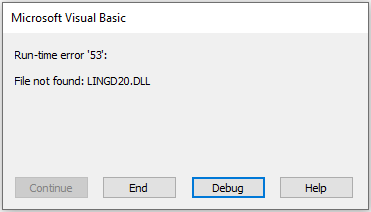
| Note: | The LINGO Excel add-in calls the LINGO DLL from Excel. As such, the bit levels of Excel and LINGO must agree. Excel can be either 64 or 32 bits. To determine the bit level of your Excel installation, start Excel and run the command: File | Account | About Excel. Excel's bit level will be displayed at the top of the About Excel dialog box. If Excel is 32 bits, then you will also need the 32-bit version of LINGO to use the add-in. Similarly, the 64-bit version of Excel would require a 64-bit LINGO installation. To determine LINGO's bit level, start LINGO then run the Help | About LINGO command. LINGO's bit level will be displayed as either Win32 or Win64. |